Set up a VR project
Create a VR project, configure it for streaming, fix the two problems the Unreal template ships with, and package it ready to upload.
Before you begin
- Unreal Engine 5.5. Not another version — see why.
- Visual Studio configured for Unreal. Packaging fails without it, and the failure does not say so clearly.
- A headset for testing — see which headsets have been tested.
Create the project
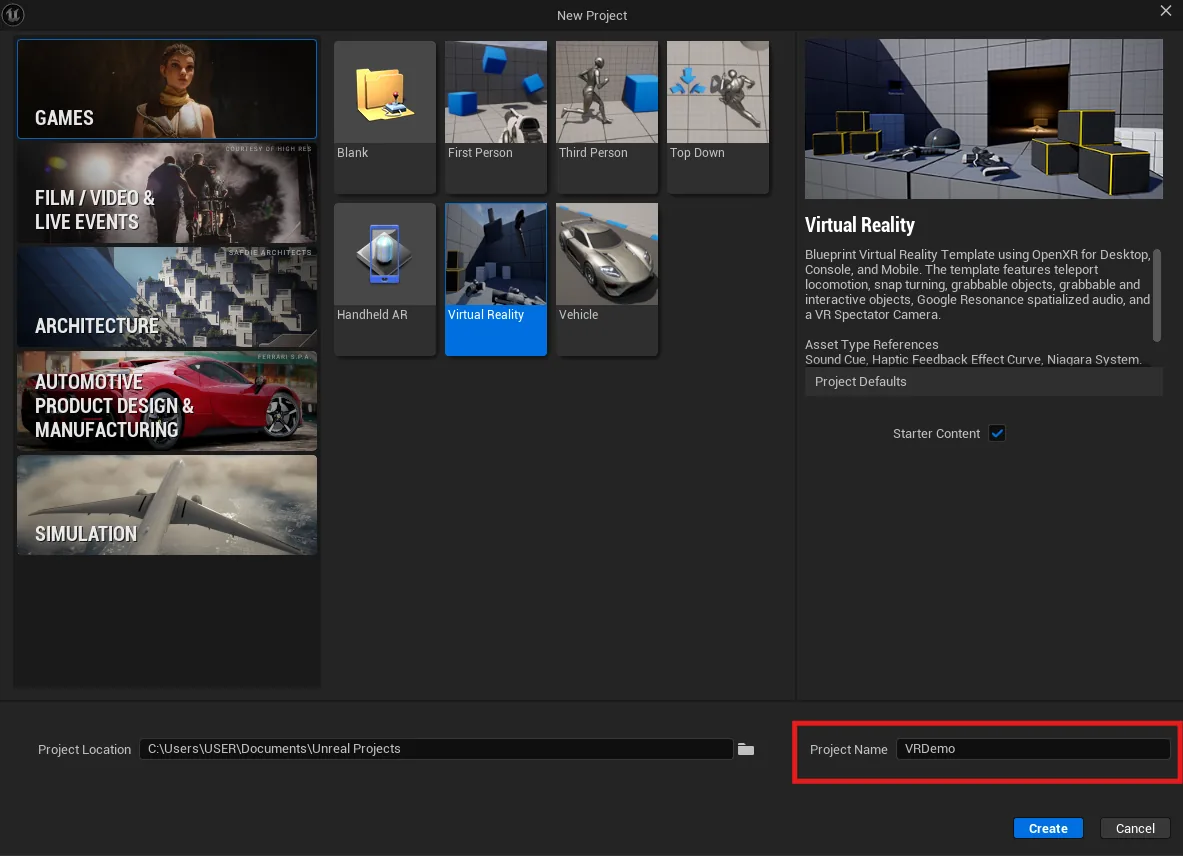
In Unreal Editor, create a new project, choose Virtual Reality under Games, name it and press Create.
Configure the plugins
-
Open Edit › Plugins
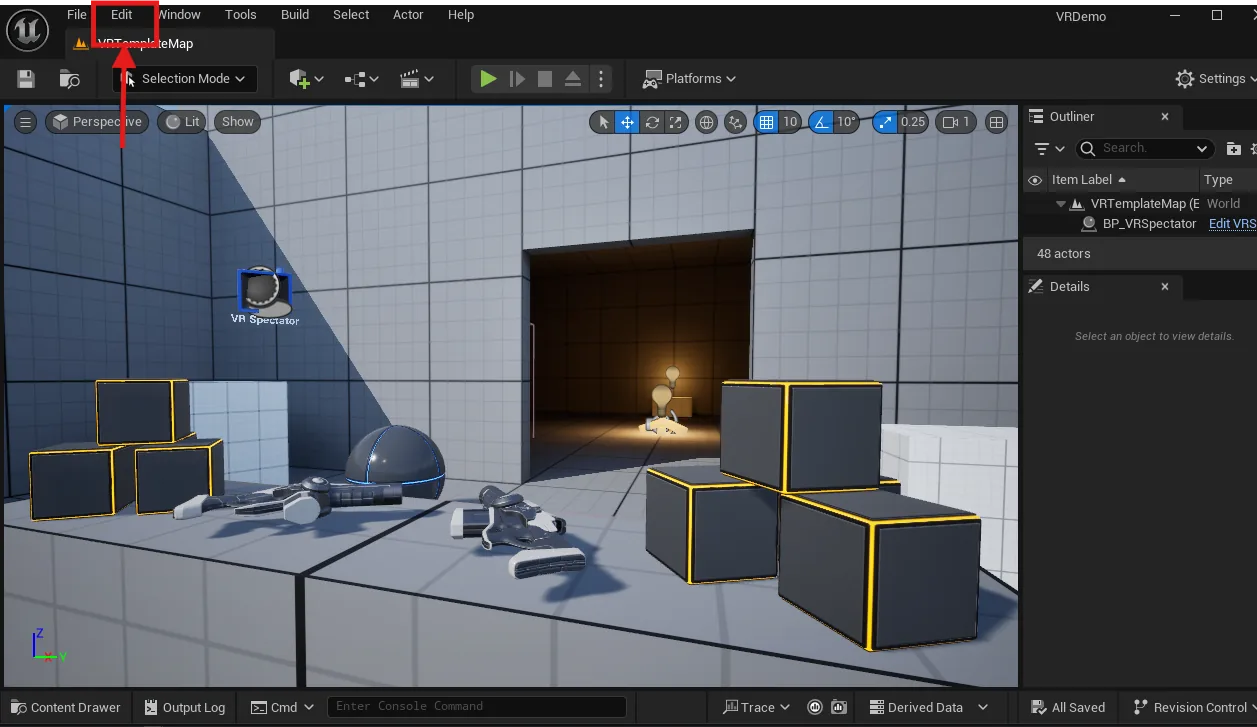
The Edit menu, where Plugins is found. -
Search "Pixel Streaming" and enable it
Tick Pixel Streaming (Plugin 1). Not Pixel Streaming Player, and not Pixel Streaming 2 if your list shows it: Pixel Streaming 2 does not stream on Unreal 5.5 — see plugin compatibility.
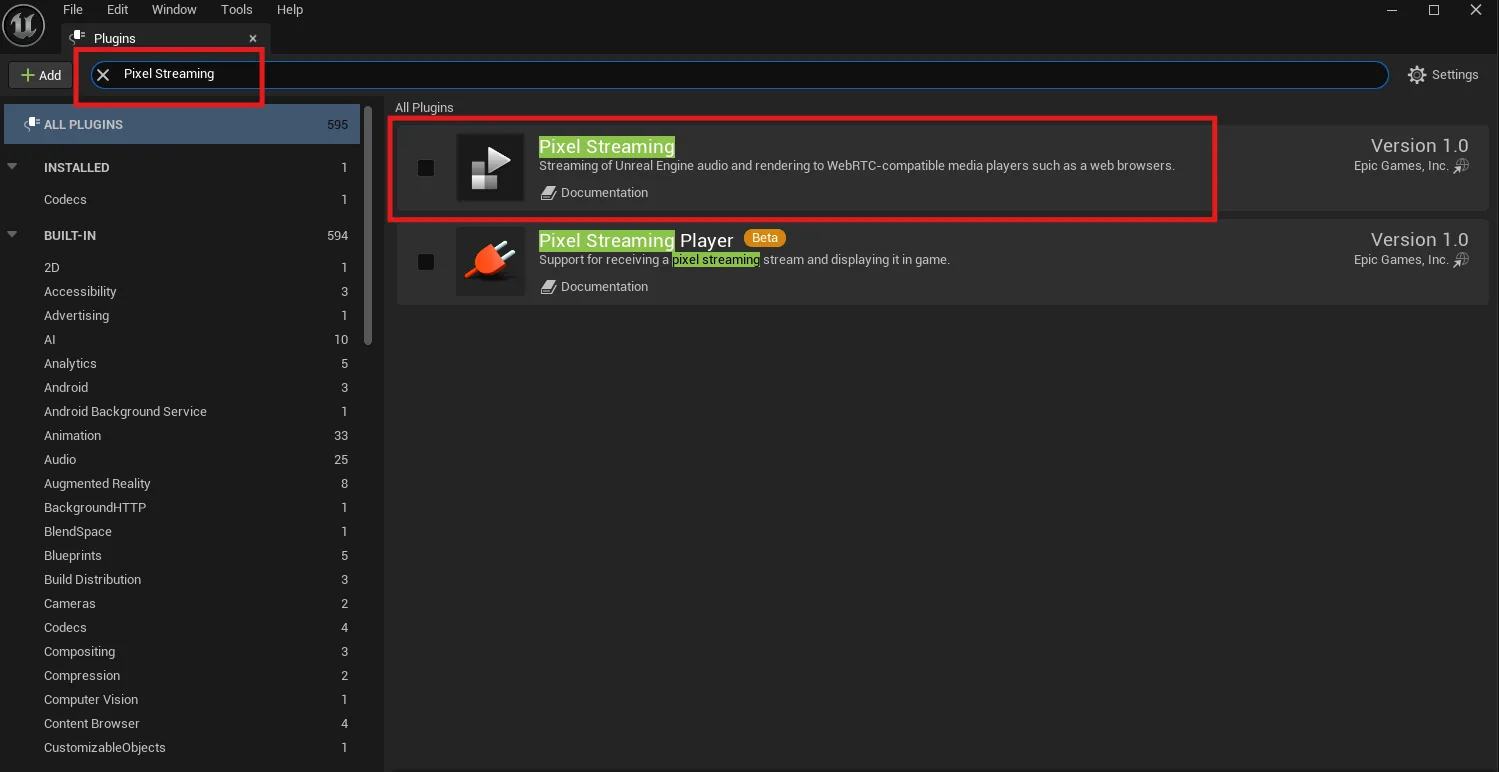
The Pixel Streaming plugin to tick. -
Search "OpenXR" and disable it
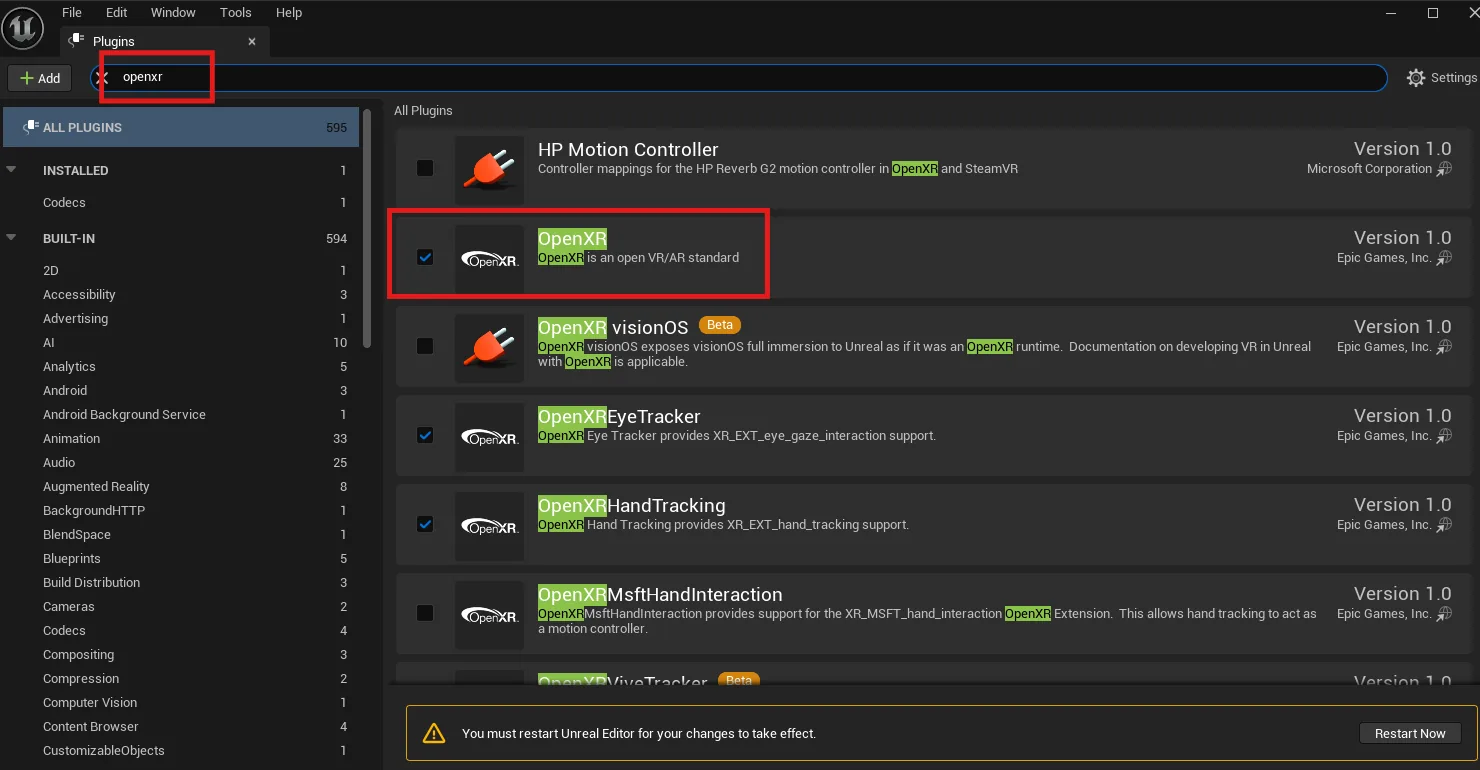
Untick OpenXR. The Restart Now banner appears at the bottom. -
Restart, then dismiss the popup that follows
Press Restart Now in the banner shown above.
Clean up the template
Two things in Unreal's VR template need attention before it will stream properly.
-
Delete
B_AssetGuidelinefrom the Content DrawerIt is a guide asset for people working in the editor, and has no place in a streamed build. Unreal warns that it is still referenced by
VRPawn; choose Force Delete.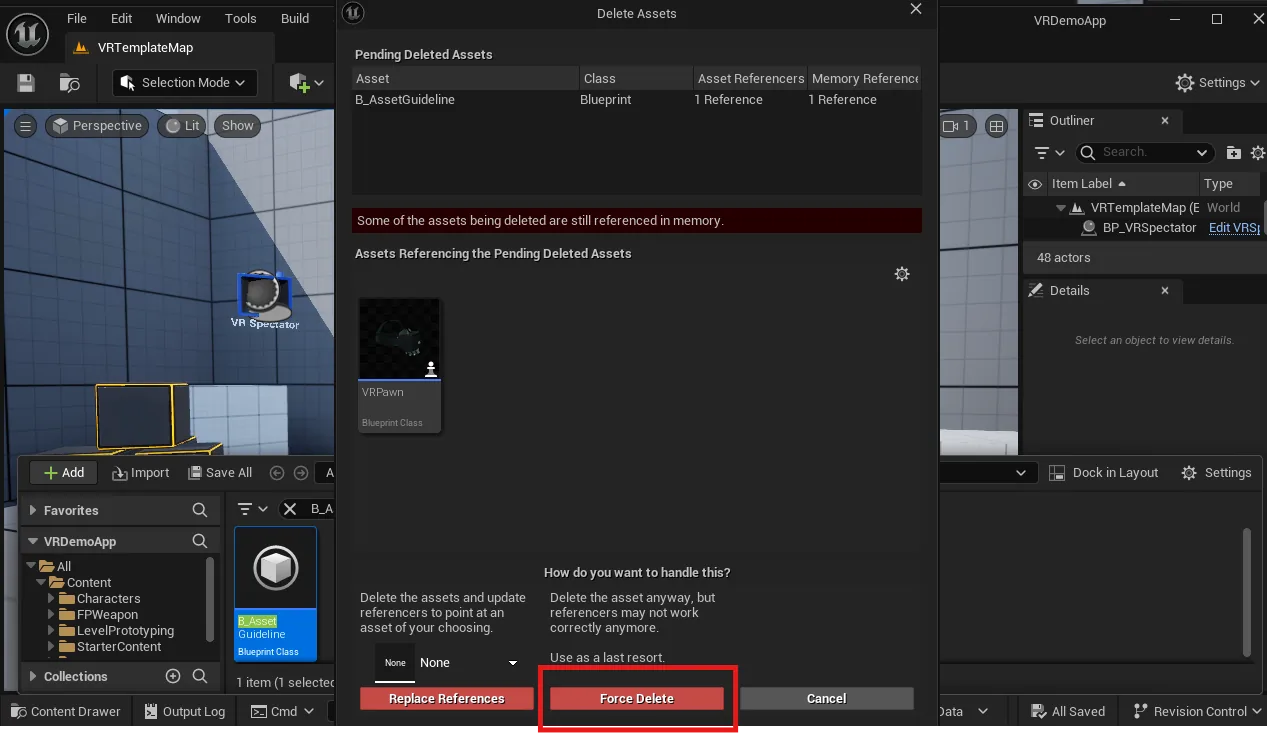
Force Delete, because VRPawn still references the asset. -
Open
VRPawn, then compile and saveThe force delete left
VRPawnpointing at an asset that no longer exists. Compiling and saving it clears that reference.
Fix the player spawning in the floor
The template's player starts partly below the ground, and returns there after
every teleport. The cause: teleportation moves the
centre of the player to the target, without accounting for
the collision capsule — so the lower half of the capsule ends up inside
the floor. There are two places to fix: the Player Start, for the first
spawn, and the teleport itself in VRPawn, for every teleport
after it. Moving the Player Start alone does not stop teleports sinking.
-
Raise the Player Start along Z
Select the Player Start actor in your level and raise its Location Z until the collision capsule clears the ground. Aim for standing on the ground — neither sunk into it nor floating above it. Unreal should also show a Bad Size label on a Player Start whose capsule is obstructed, and clear it once the capsule is free.
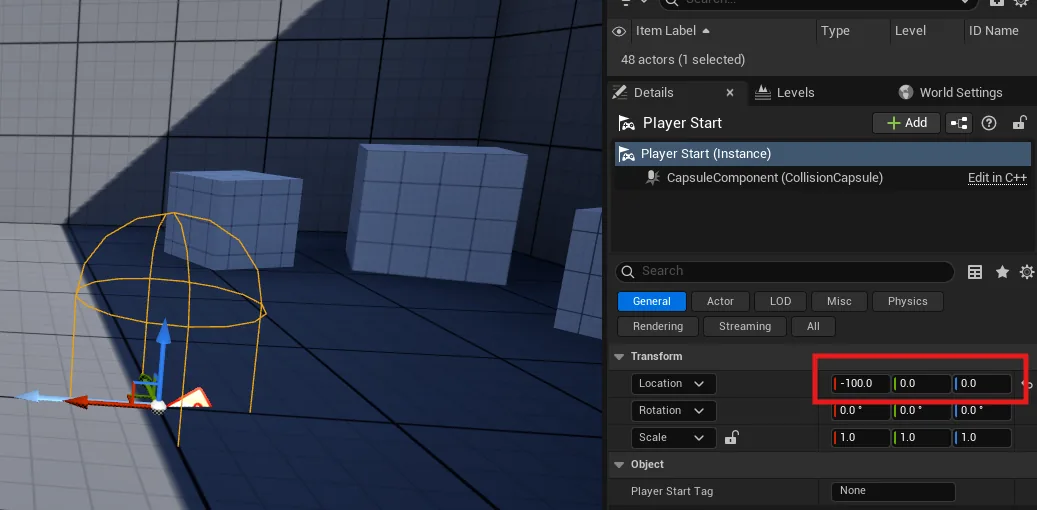
Before: Location Z is 0 and the capsule reaches into the floor. -
Add +110 on Z to the teleport destination
Open
VRPawnand find the TryTeleport function. Between the calculated teleport location and the Dest Location input of the Teleport node, add a vector + node with X 0, Y 0, Z 110. The player then lands standing on the floor rather than half inside it. Compile and save.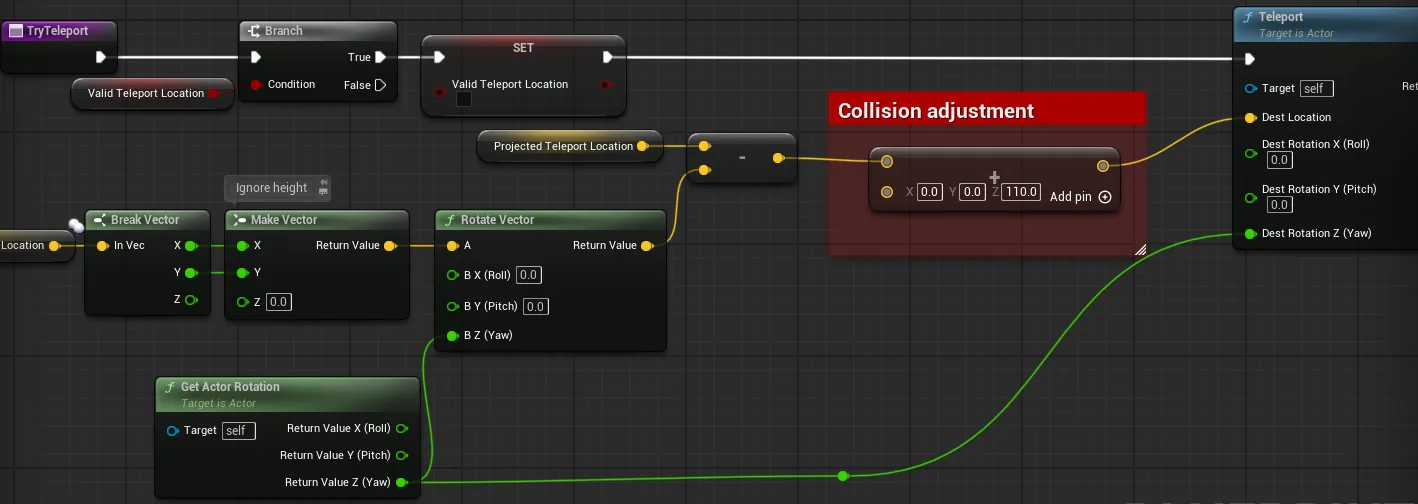
The collision adjustment: +110 on Z before Teleport.
Package it
-
Platforms › Windows › Package Project
Choose an empty folder for the output.
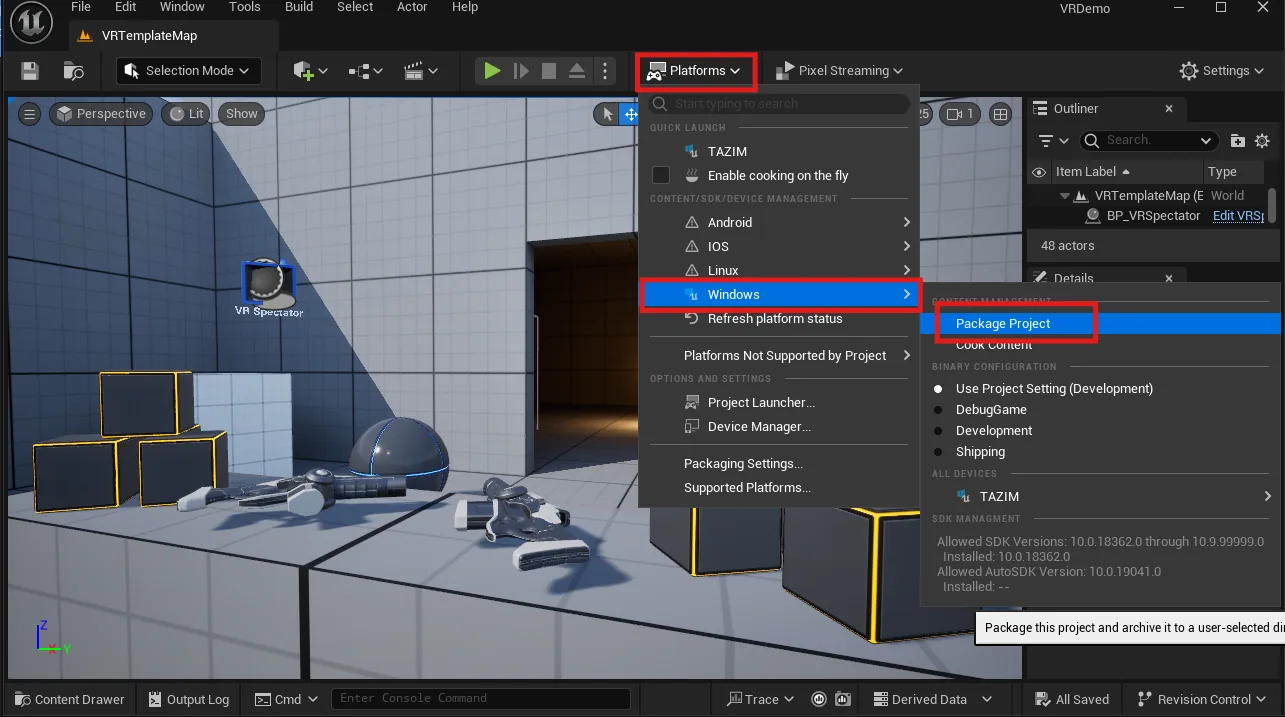
Platforms › Windows › Package Project. 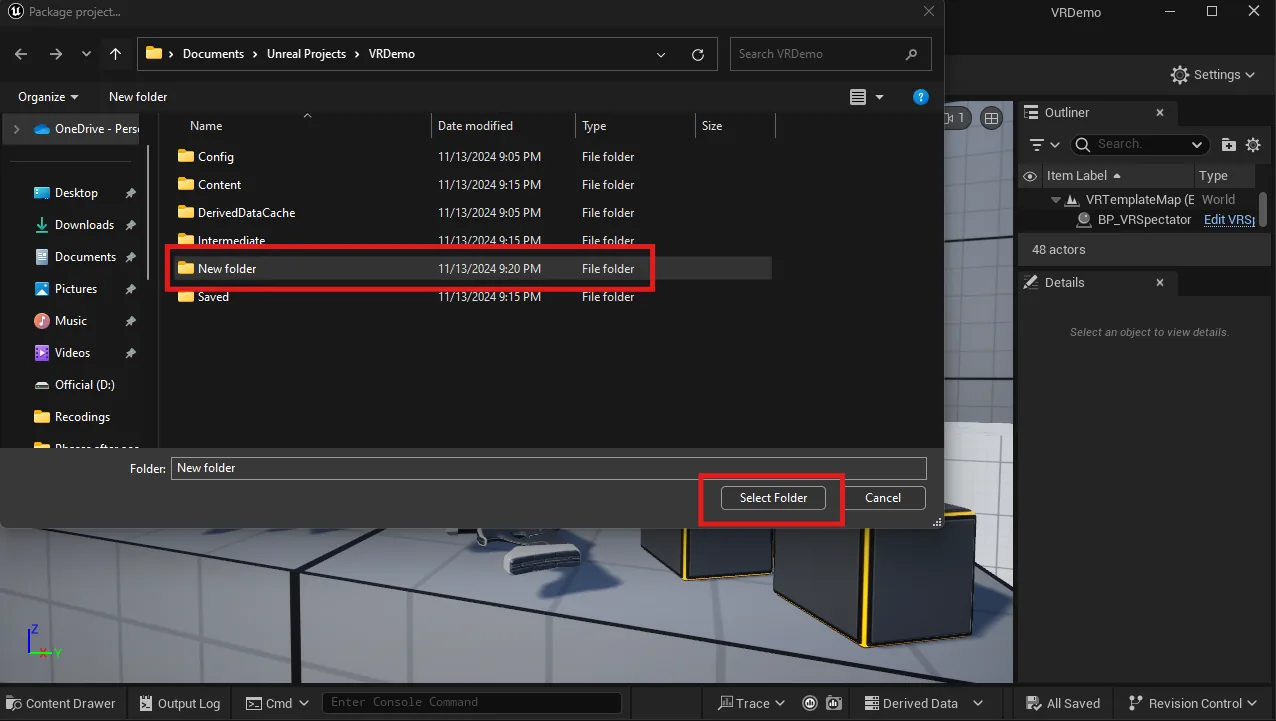
An empty folder for the output, then Select Folder. -
Watch the output if it fails
Press Show Output Logs. The most common cause of a packaging failure is Visual Studio not being configured for Unreal, which the log will say and the dialog will not.
-
Zip the contents of the Windows folder
Select everything inside it and compress that — not the folder itself, which buries the
.exea level too deep.
A ZIP ready to upload. Test it locally with a headset first, then upload it exactly like any other application.
Test it locally first
Before uploading, run the build on your own computer and open it in the headset. A VR fault is much easier to see there than through a stream. The one extra step is HTTPS, because a headset's browser only allows VR on a secure page. Testing VR locally covers every step.
Then open the app's streaming URL in the headset's browser.
Last updated