Upload from the editor
With the E3DS Automation Tools plugin, one click packages both builds, bundles them into archives, and uploads them to Eagle 3D Streaming — instead of two packaging runs, two ZIPs and two browser uploads.
The Automation Tools plugin
extracted into your project's Plugins folder, Pixel Streaming
enabled, 7-Zip installed, and the
E3DS engine build — the binary
Launcher engine cannot produce a server, with or without this plugin.
Configure it
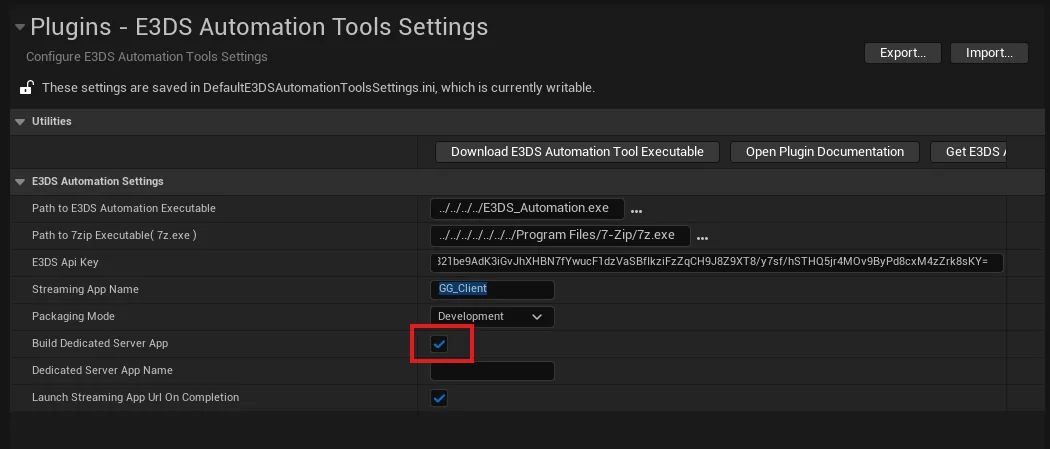
Edit → Project Settings → Plugins → E3DS Automation Tools Settings.
| Setting | What to put in it |
|---|---|
| Path to E3DS Automation Executable | The E3DS_Automation.exe you get from the Download E3DS Automation Tool Executable button on this same page. |
| Path to 7zip Executable( 7z.exe ) | Your 7-Zip installation. |
| E3DS Api Key | Get E3DS Api Key opens the Control Panel's Developer Section; copy the key from its API Key tab and paste it into the field. Only the account owner sees the Developer Section — a team member has to ask the owner. |
| Streaming App Name | Letters, numbers and underscores only — no dots, no spaces. |
| Packaging Mode | Development or Shipping. See below. |
| Build Dedicated Server App | Enable this. Without it you get only the game build. |
| Dedicated Server App Name | The same name you used for the server application. |
| Launch Streaming App Url On Completion | Opens the stream in your browser as soon as the upload finishes. |
Development or Shipping
The same choice as for any upload — see choose a packaging mode. In short: use Development until the pipeline has worked once.
Run it
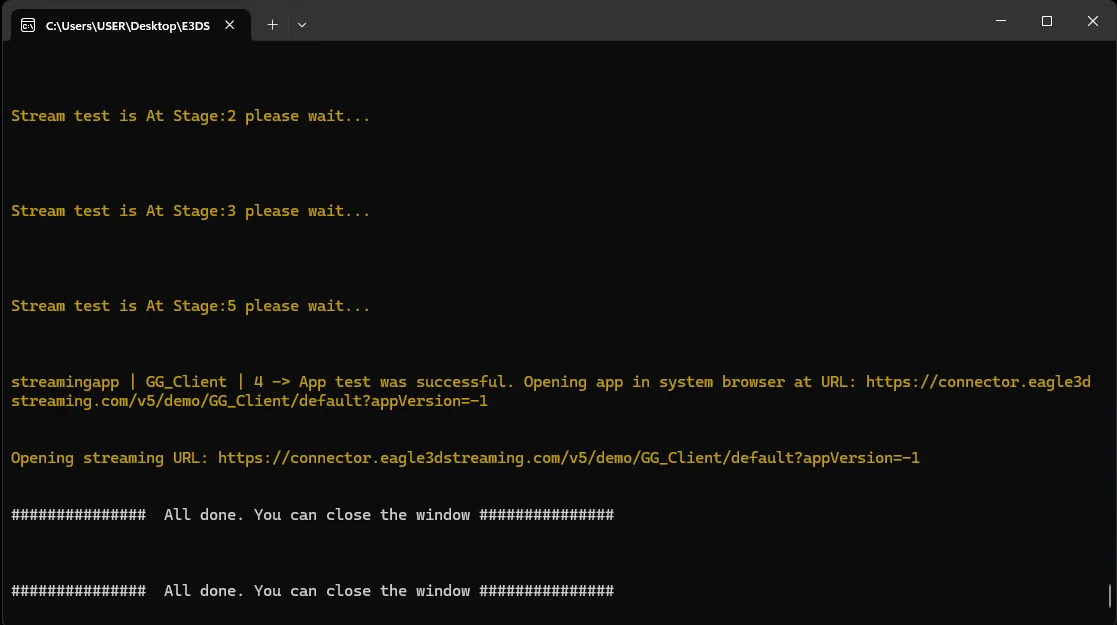
Click the E3DS button in the toolbar. Depending on the plugin build, it either offers Launch E3DS Automation Tool to choose, or — as in the GitHub source, where the button is labelled E3DS-Push To Cloud — starts straight away. A command prompt opens; packaging runs, then upload. After a few minutes it reports both the server app and the game app uploaded.
If the upload fails
- Not enough disk space where the packaged folder lives — two builds plus their archives need room.
- A setting above is wrong — most often a path or the API key.
- You are on the binary engine from the Epic Launcher, which cannot build a dedicated server at all.
- Visual Studio is not properly set up for Unreal.
Both builds are uploaded — now get players into them.
Last updated