A dedicated server
Run your Unreal dedicated server and two clients on one machine, and confirm they meet — before any of it goes near Eagle 3D Streaming.
Server build and client build are different things
| Server | Client | |
|---|---|---|
| File | YourProjectServer.exe | YourProject.exe |
| Job | Hosts the session and manages everyone connected to it. | Joins a session and plays. |
| On screen | Nothing — it is a console process. | A normal game window. |
Start the server
-
Right-click
YourProjectServer.exeand Create shortcut.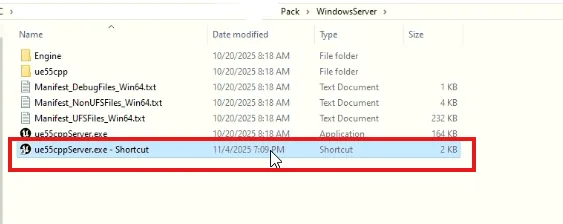
-
Open the shortcut's Properties, and at the end of the Target field add a space and
-log.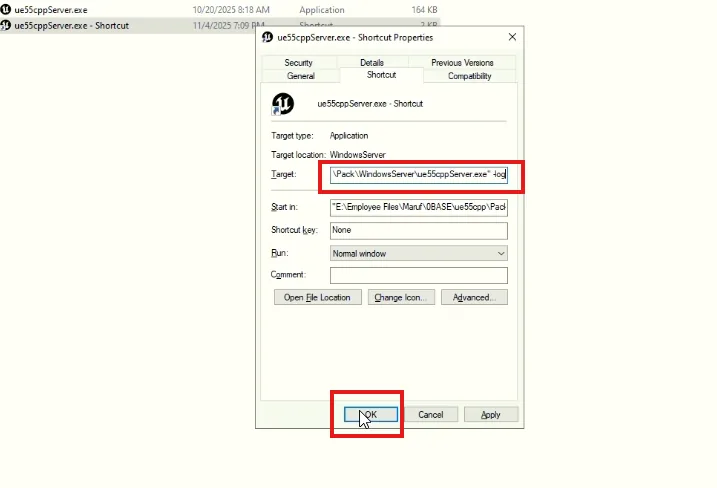
-
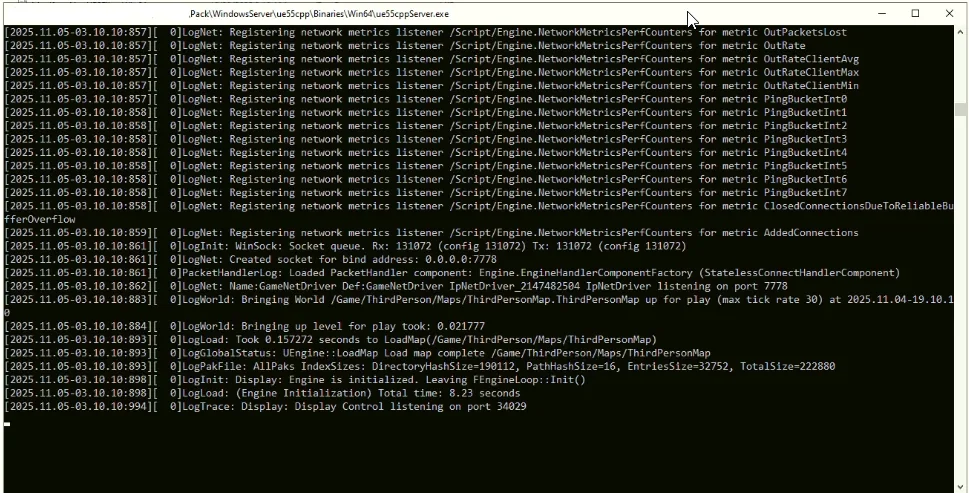
Run the shortcut. A console window opens with the server's log.
Find the port
Read the listening port out of the log — usually 7777.
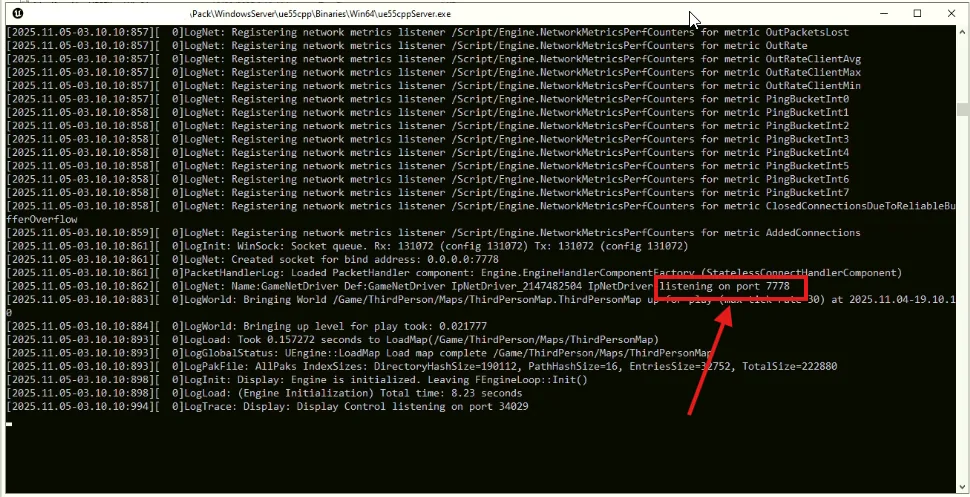
The screenshots on this page were taken with another server already running,
so they show the incremented port: listening on port 7778 in the
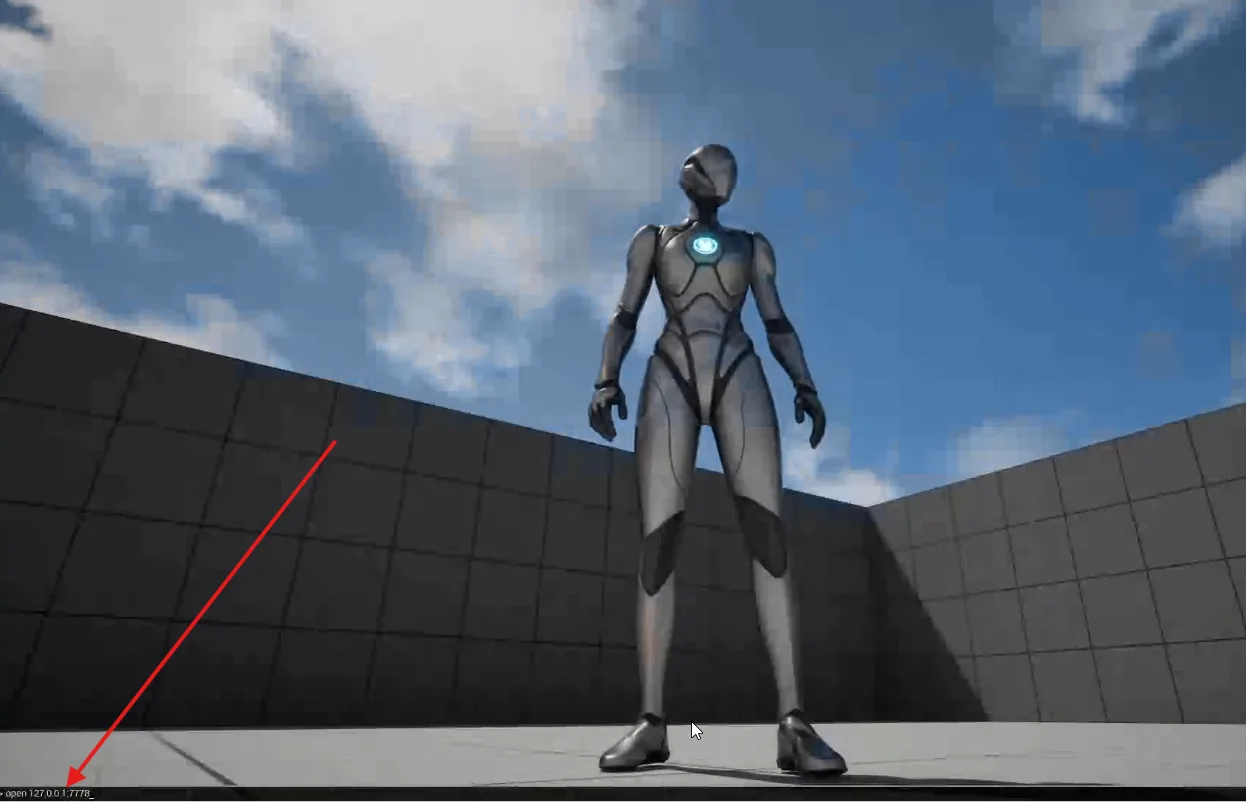
log, and open 127.0.0.1:7778 in the client below.
Connect a client
Run
YourProject.exeand wait for the menu or play screen.-
Press ~ to open the in-game console.
-
Type the connect command with the port from the log:
open 127.0.0.1:7777
Then do it again in a second client instance, so two players are in the same session. If the game is fullscreen and you cannot reach the other window, the Windows key or Alt+Tab gets you out.
Both clients in the same session, seeing each other. That confirms the server accepts connections and replication works — which is what you want established before adding streaming, scaling and the platform on top.
Removing the typed address, once the pair works locally.
Last updated