Upload both builds
Both builds go to the Eagle 3D Streaming Control Panel, but to different places: the server to Multiplayer Server Apps, the game to Streaming Apps like any other app.
Upload the server build
-
In the folder you packaged the server into, open WindowsServer, select everything in it, and ZIP it.
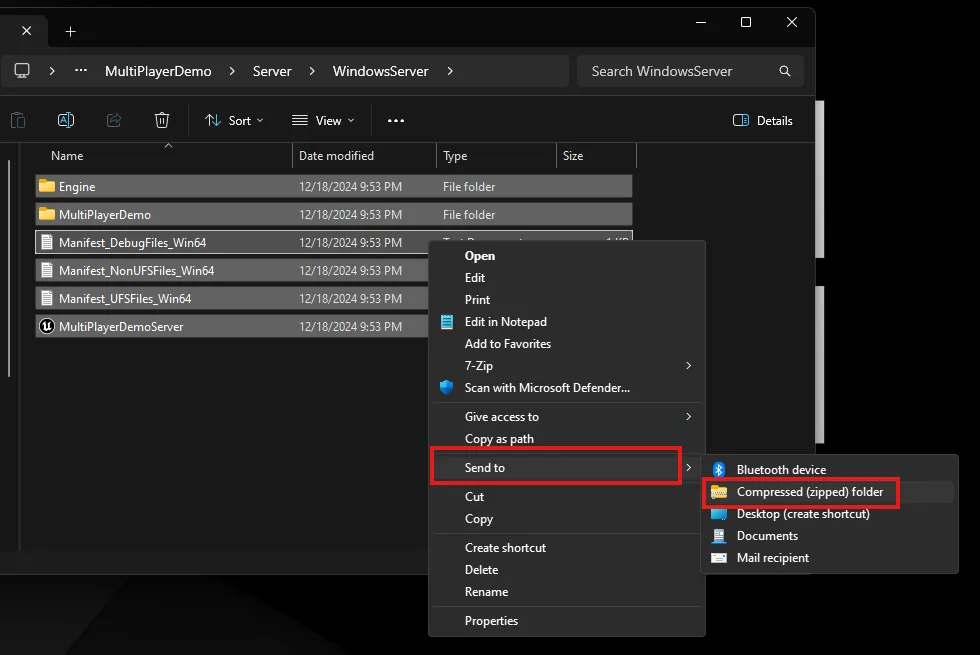
-
In the Control Panel, go to Multiplayer Server Apps — not the ordinary Streaming Apps list.
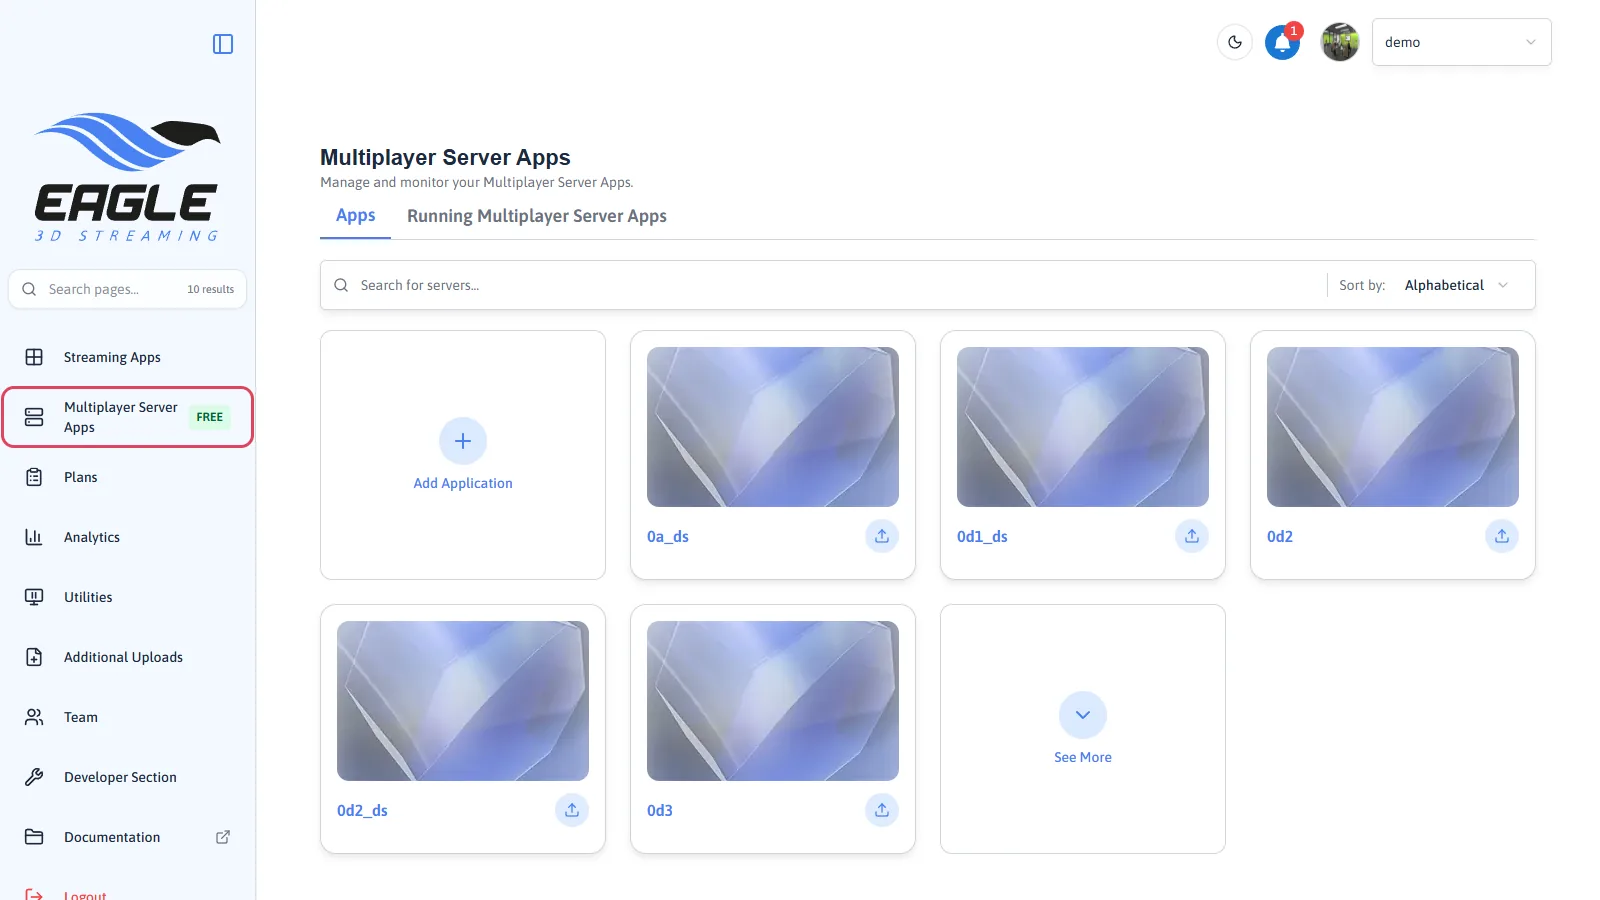
-
Click the Add Application card — the first card in the grid — and browse to the ZIP.
-
Name it exactly as the
.exeat the root of the ZIP.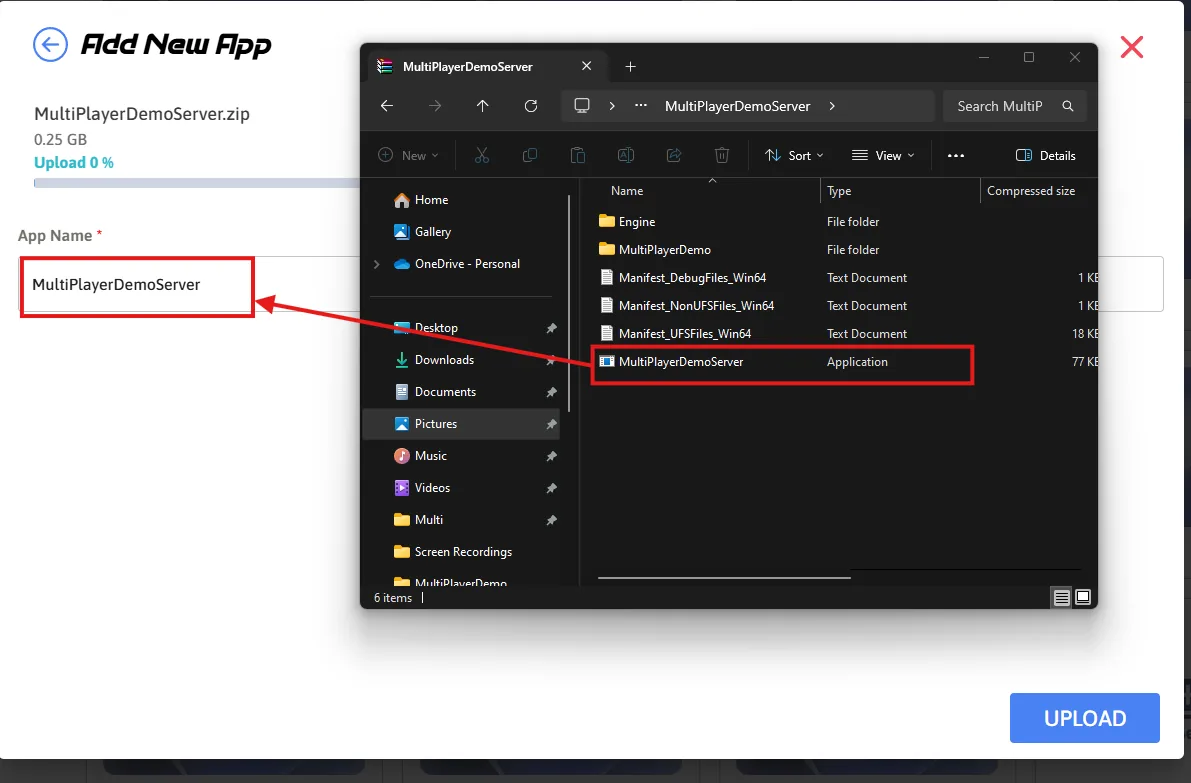
-
Upload.
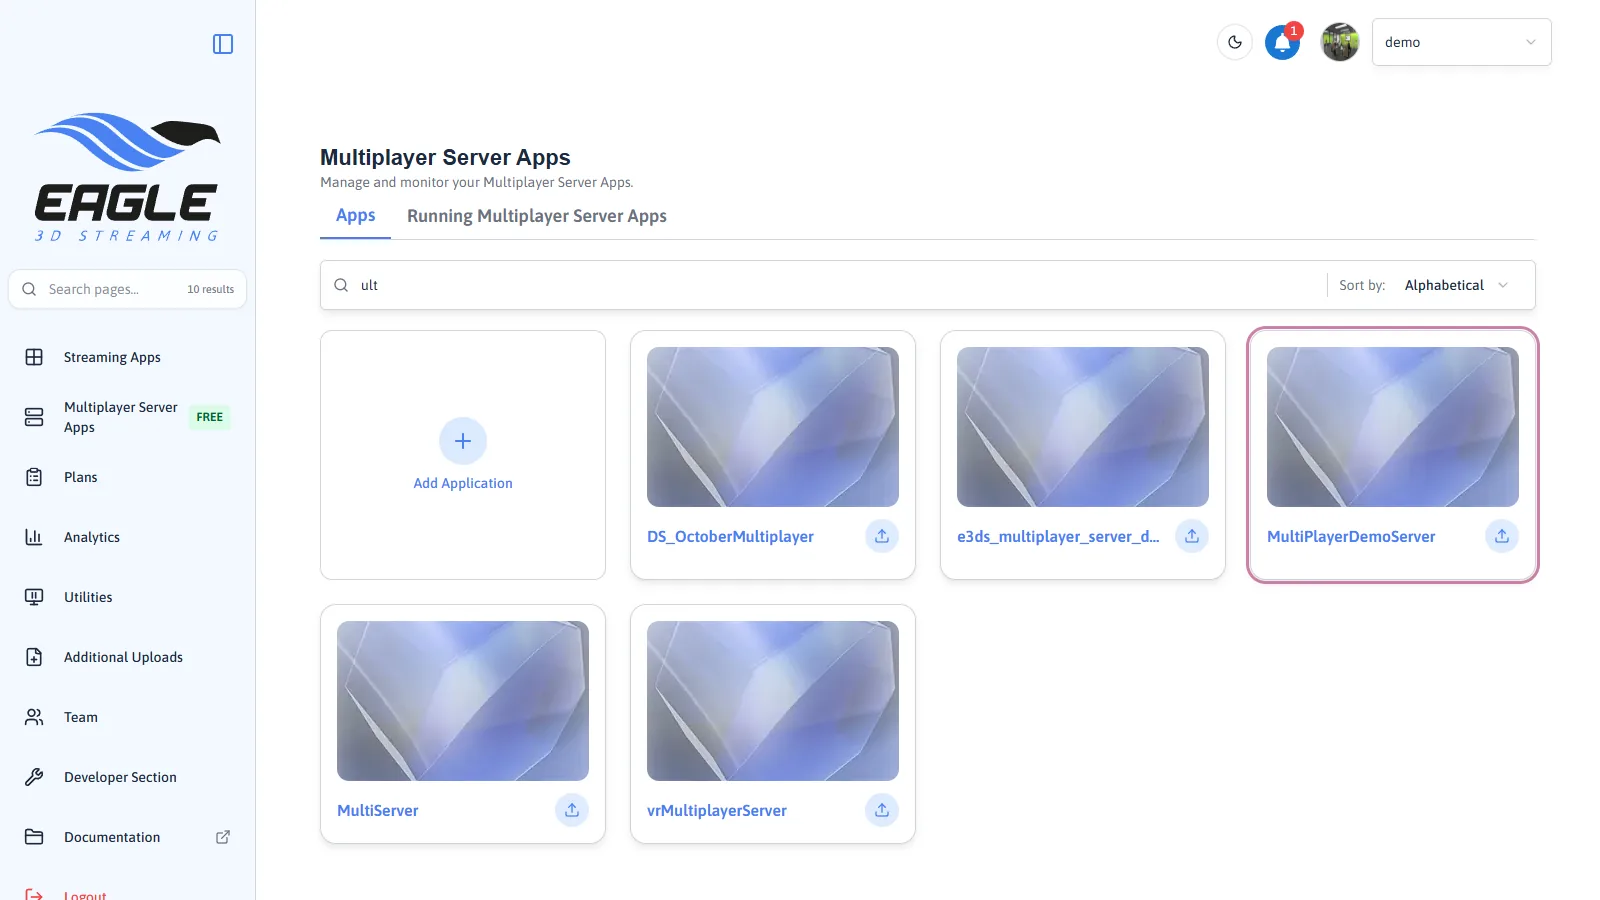
Upload the game build
Same shape, ordinary destination.
In the folder you packaged the game into, open Windows, select everything, and ZIP it.
In the Control Panel, under Streaming Apps, choose Add Application and browse to that ZIP.
Name it — letters, numbers and underscores only — and upload. An ordinary upload does not ask for the name to match the
.exe, so the game should not need to — only the server does.
It then goes through the six upload phases like any other app.
Getting two people into the same world.
Last updated