Build the project
Starting from an ordinary Unreal Engine Third Person project: convert it to C++, add a server target, and point the server at a map.
A project made from the Third Person Template, packaged and working — see prepare your app. If you stream that as it stands, two viewers get two separate worlds and cannot see each other. That is what the rest of this fixes.
Open it in a source build of Unreal — the E3DS engine build or Epic's source from GitHub. The Launcher engine cannot build the server target in step 3.
Step 1. Convert the project to C++
A server build is declared by a .Target.cs file, which lives in
the project's Source folder. A Blueprint-only project has no
Source folder, and adding a C++ class is what creates one. That
is the entire reason for this step — you do not have to write any C++.
-
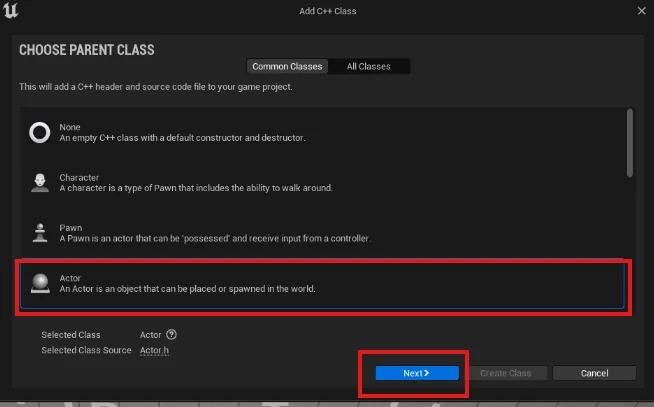
Tools → New C++ Class, choose Actor, and create it. Then close the editor.
-
Right-click the
.uprojectand choose Generate Visual Studio project files.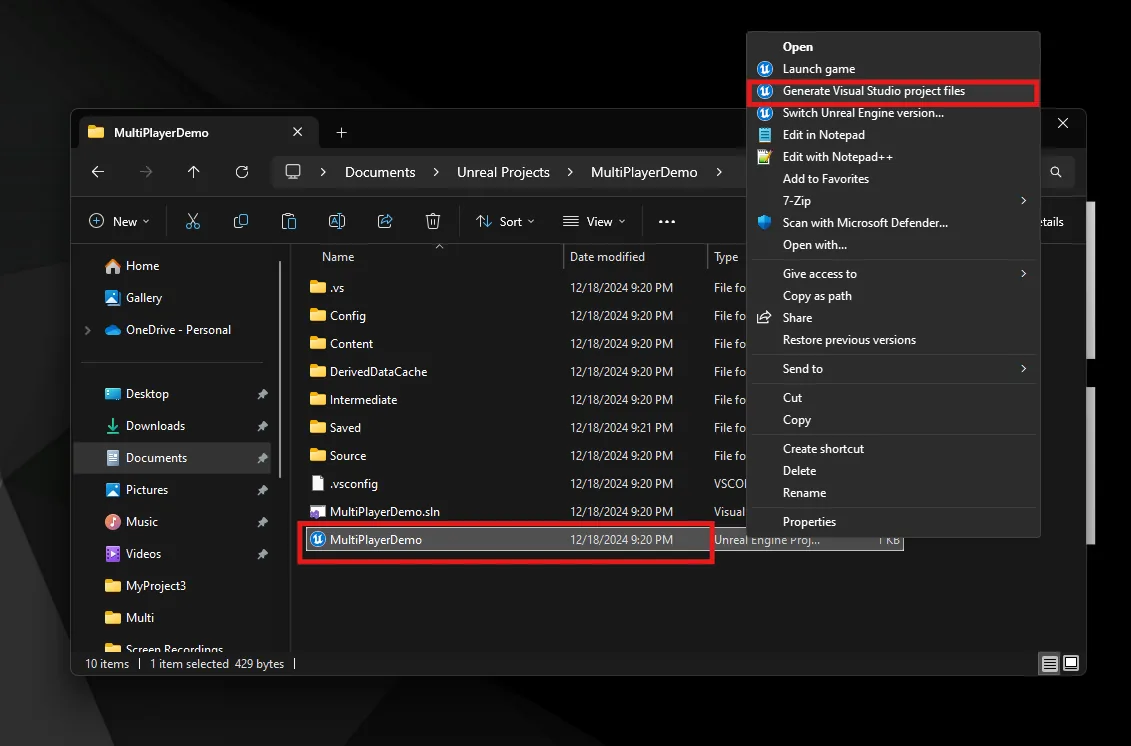
-
Open the
.sln, select your project under Games, set the configuration to Development Editor, and build with Ctrl+B.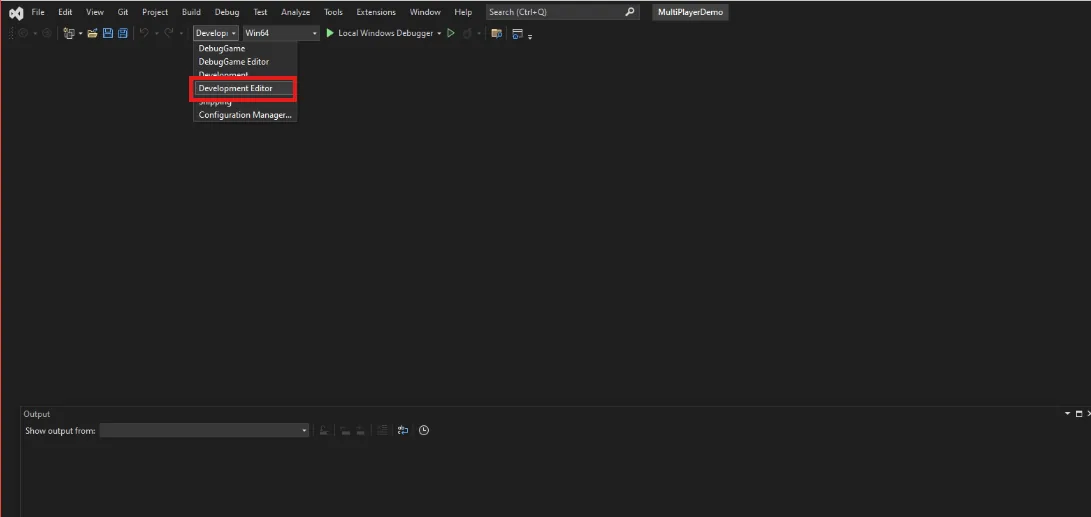
Step 2. Add the server module
In the project's Source folder, create a file named
YourProjectNameServer.Target.cs — with your real project name
— and put this in it:
// Fill out your copyright notice in the Description page of Project Settings.

using UnrealBuildTool;
using System.Collections.Generic;

public class YourProjectNameServerTarget : TargetRules
{
	public YourProjectNameServerTarget(TargetInfo Target) : base(Target)
	{
		Type = TargetType.Server;
		DefaultBuildSettings = BuildSettingsVersion.V2;   // copy from YourProjectName.Target.cs

		ExtraModuleNames.AddRange( new string[] { "YourProjectName" } );
	}
}Step 3. Build both targets
Regenerate the Visual Studio project files, so the new target is picked up.
-
Open the
.sln, set the configuration to Development Server, and build with Ctrl+B.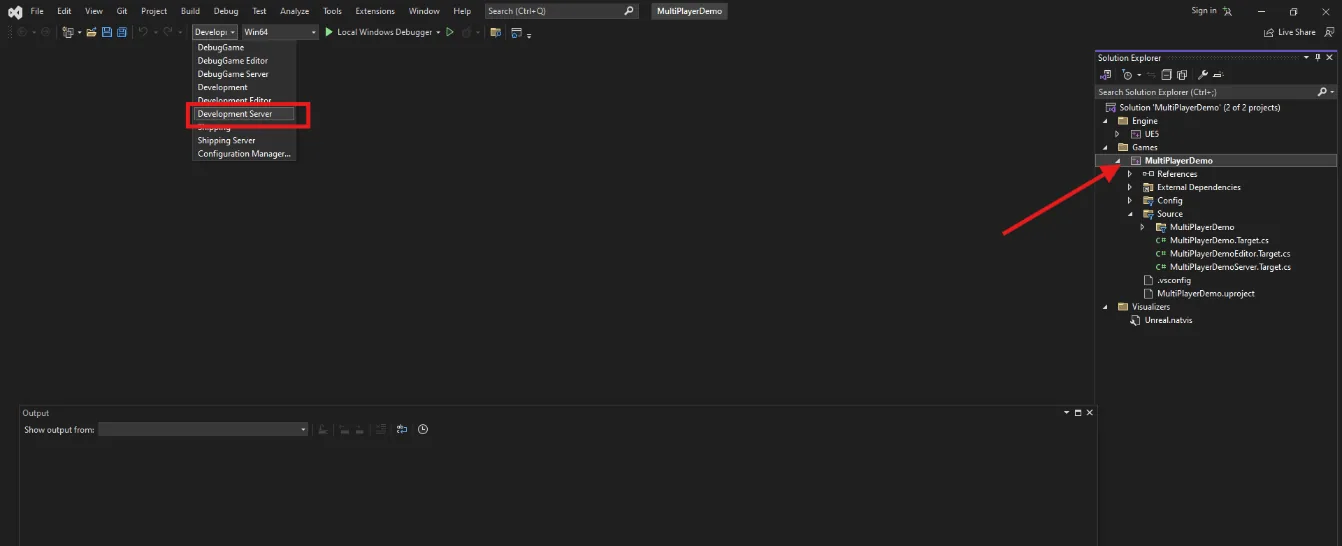
-
Switch to Development Editor, build again, then press F5 — which opens the project in Unreal.
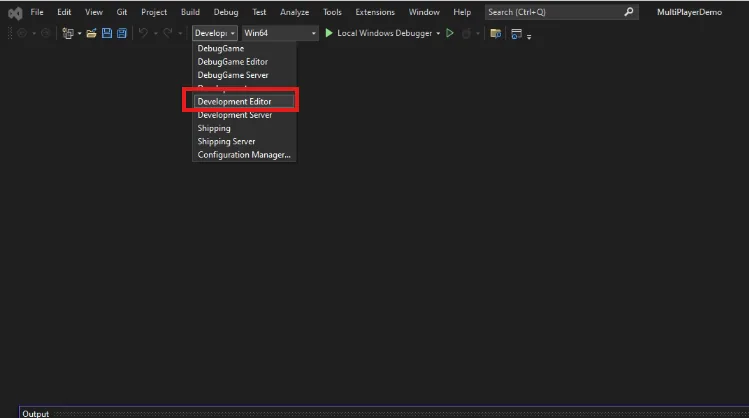
If it is not in the list, either the .Target.cs file was not
picked up — check the filename and regenerate the project files again
— or the project is open in the Launcher engine, which cannot build a
server target at all. Fix whichever applies before going further.
Step 4. Tell the server which map to open
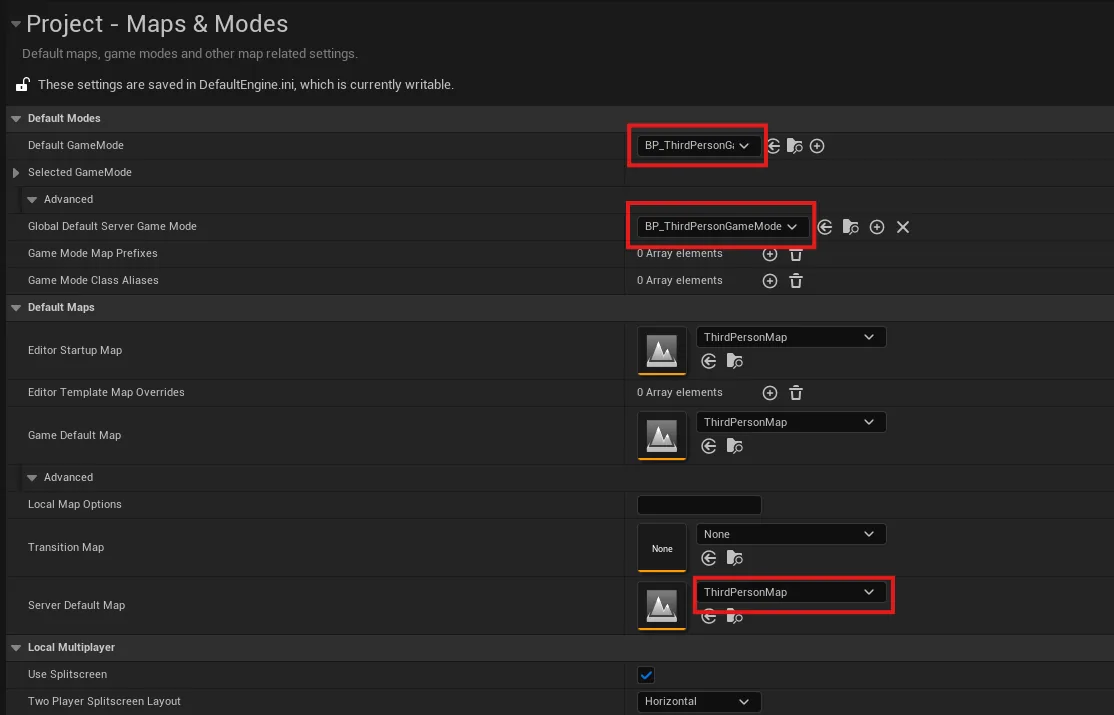
In Project Settings → Maps & Modes — both settings are hidden until you expand Advanced, under Default Modes and under Default Maps:
| Setting | Value |
|---|---|
| Global Default Server Game Mode | The same game mode as your Default Game Mode |
| Server Default Map | ThirdPersonMap — or VRTemplateMap for a VR project |
One server build, one game build, from the same project.
Last updated